 |
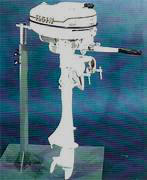
Awakening Old, 1952 & 1959 2 HP Air Cooled Elgin Outboard Motors |
One thing that I want to convey here is that I write only on motors that I have actually worked on, and over a period of MANY years, consisting of many THOUSANDS of hours, and then more in maintaining/updating these pages. These articles are usually motor specific, HOWEVER if you are having a diagnosis issue, my Trouble Shooting article covers MANY more aspects that may help you diagnose your issue. CLICK HERE for access to that article.
I have two of these little jewels, one
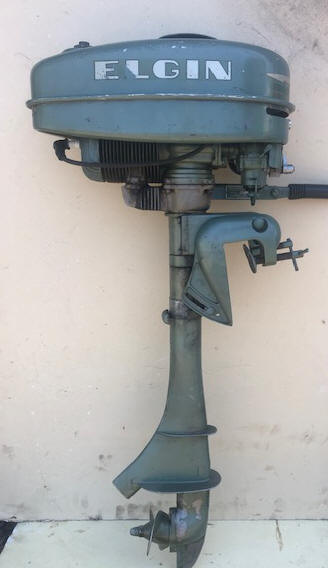
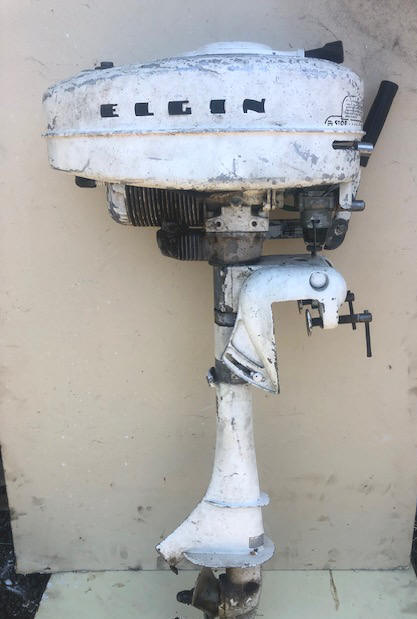
a 1952 and the other appears to be a 1959. The reason I say APPEARS
is that the model number is not listed on any data, but the color is white,
which pretty well dates it, as white appears to be only for one year.
Here, Sears and West Bend worked together to develop their outboard product line, one that fit the Sears consumer's budget, lifestyle and Sears' guidelines for quality. They were wise in using existing well known Wico magnetos and Tillitson carburetors. This relationship was highly successful and profitable for 12 years with their agreement remained exclusive through 1959. It was this "Family" of apple green, small (1 1/4 to 7 1/2 hp) Elgin motors from 1946 to 1959 that are best known today. This series is what we will be working on here which were unchanged from 1946 until 1951. These motors underwent a redesign, among being 360 degree steering and a hinged steering handle in 1952. In 1954 a recoil starter unit was added. They were made for Sears until 1959 when the contract with West Bend ended. West Bend did continue manufacturing motors under their own name for a few years.
Of the
small air cooled outboard motors made during these years, these (made by
West Bend) were the probably the most dependable, and easiest to work on.
Sorry Clinton and Eska, but that is the way many of us older mechanics see
it, as you tried to copy the Elgins of that time.
The 1952, I got at a AOMC swap meet, winning it on the
raffle. This one is in very good shape and took very little (just cleaning
the points) to get it running. The 1959 was a whole another story.
| Here is the 1952 | And here the 1959 |
 |
 |
Statistics For These Motors :
These are
Cylinders 1
Bore diameter 1.375"
Stroke 1.560"
Displacement 3.76 CI
Starter
manual independent / recoil rope
Bearings,
bronze bushings for the rods & lower main bearing, with needle
roller top main
bearing
Carburetor - Walbro exit throat dia. .846" ----Tillotson MD 59A .762"
High speed jet, adjustable . Starting
point 1/2 turn out
Idle jet - Starting point 3/4 turn out
Fuel capacity - 5 pints
Fuel mix - Per gallon of gas, SAE-30 Oil
3/4 pt. for running, -- 1/2 pt. for trolling
Magneto - Wico
Point gap is .020"
Plug gap .050 " , Champion J11J, J12J or
RJ12C spark plug, or NGK BMR4A
Flywheel key - .125 wide X .187 thick X
1.500? long, radius tapered on bottom
Flywheel nut/bolt - 7/16" NC
nut for rope starter, 5/16" NC bolt, --
9/16"
wrench size for recoil starter
Transom Clamp - double screw
Gearbox oil - Waterproof boat
trailer grease
Gear
Ratio - 14 - 21
Prop. dia. & pitch - 2 Blade 6 1/2" X 4" LH
Prop
shear pin 5/32" X 15/16"
Prop
nut - 1/2" X 13 NC
Prop Nut cotter pin - 3/32" X 1"
Weight 27# for the pre 1954s & 29# for the post ones with the recoil starter
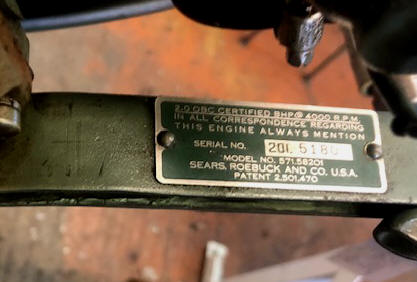
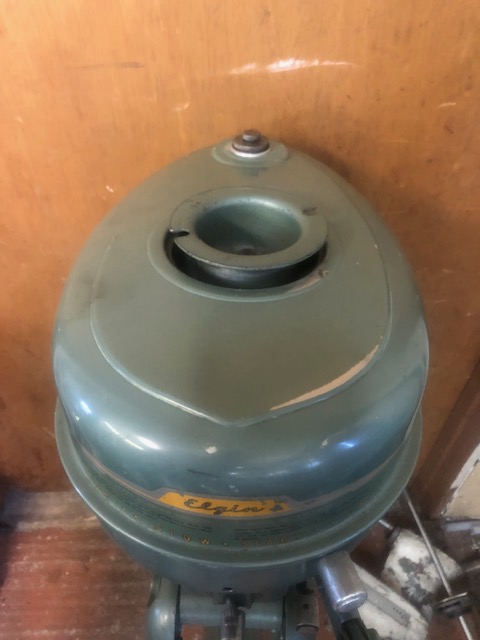
Overview ; The motors we will be discussing are second version, single cylinder air cooled 2 hp outboard motors made by West Bend for Sears Roebuck and Co. from 1952 to 1959. The EARLIER 1946 version is covered HERE. This early version only swivels about 160 degrees and has no neutral or reverse. The stamped out welded aluminum fuel tank is actually the upper cowling. It is a Sears model is 571.58201, serial number includes the prefix model number 201-5180.
Identifying the model may be hard at times as it was on the decal on the front of the fuel tank as shown in the photo above which may have gotten obliterated over the years.
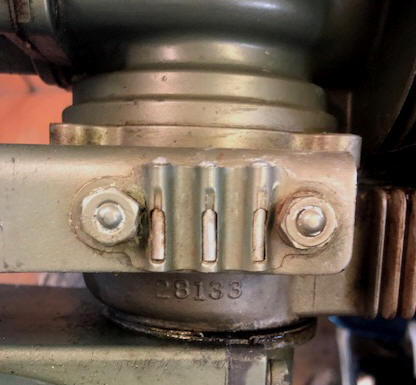
The 1952 again, uses a separate wrap around rope starter mounted on top of the flywheel. But this version does have 360 degree steering, giving you a reverse. For this version, they added a ID plate visible on the inside base of the tiller handle as seen in the LH photo below. In the RH photo below, you will see spare shear pins in a spring tension holder on the outer rear of the tiller handle.
The exact date of manufacture however may be hard to come up with and will usually be a guesstimate based on manufacturing numbers (if available).
| Here is shown the ID plate on the 1952 |
Here they have added a spare pin holder for 3 spare pins |
 |
 |
The second motor we will be dealing with is a 1959 model number 571-58251 s/n 1815. (By the way, this motor does not exist in any commonly published data. It also uses a Walbro carburetor model LMG 175 A, which also does not exist on paper) that I can find.
Upon getting it home, sure the paint was far from new (apparently no
primer was used) and very little of
the decals left, but I was
pleasantly surprised to find that nothing was missing for a 65 year old
motor. From the
initial looking, the gas tank had a small dent on both sides, but all the
carburetor parts were there, choke, knobs, fuel line shut off worked AND
the fuel tank was dry but had some evidence of inside oxidation, that came
out nicely by adding some gas and small round river stones, then shaking
the tank. And, yes it had some debris inside
the carb. Later I had a running issue, (starving) so I pulled the
fuel/strainer outlet and found it pretty well plugged. However getting deeper in the carb, I ran into
a real issue (explained below).
However rotating the flywheel using a cordless drill motor
and socket on the flywheel nut, there was no spark. So full the
flywheel and take a peek under it. First thing I noticed was
there was a considerable amount of oil on all the internal parts, and the
coil's exposed metal parts were rusted, along with the flywheel magnets
being oxidized.
I got the oil residue off by using a small paint brush and Acetone.
Then I ran a point file through the points. And removed oxidation
off the magnets using 3M Scotch-Brite. BINGO I got spark.
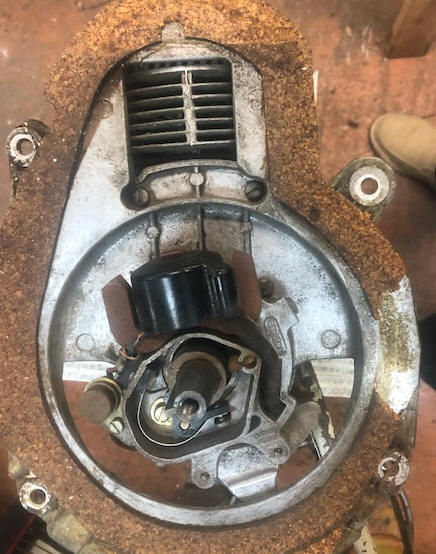
In the photos below you can see the flywheel and ignition system. Note -- the cork gasket in the RH photo, which seals the gas tank to the top of the block, helping to direct the air flow over the cylinder fins, from the fins on the flywheel.
| Here you see the flywheel with fins | Here you see the top of the powerhead |
 |
 |
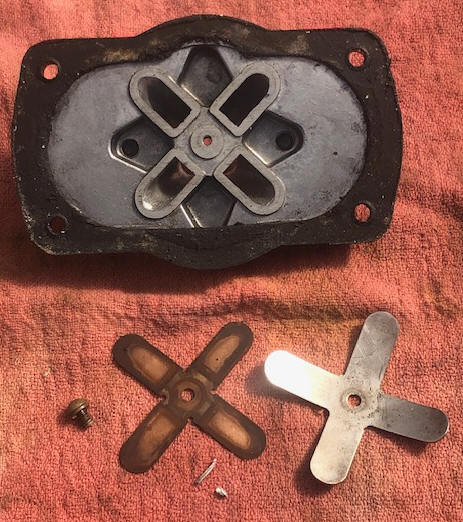
I bought a new spark plug, cleaned up the fuel tank, reinstalled everything, even with starting fluid I could not get a pop, then when holding onto the tiller handle while rotating the motor with the drill motor, something odd was happening. My hand was getting wet with gasoline being spit out the carb throat. OK, tear things apart again, but this time also remove the intake manifold. What I found was 3 aluminum chips under 2 of the 4 reeds. They looked like something being drilled in aluminum with a pilot hole and the chips had one jagged saw type edge.
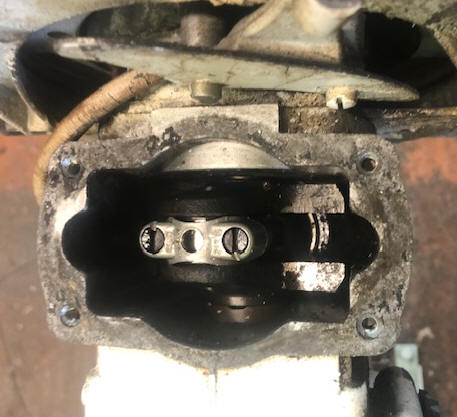
| Here you see the intake manifold and reed valves. LOOK CLOSELY at the debris on the bottom center | Here you see what is under the intake manifold showing the connecting rod bolts |
 |
 |
Then after reassembly again, she still does not want to fire. I know it now has gas, I also knew the old spark plug had fire, but what about this new one? NOPE, -- it was dead. Change back to the old plug and she runs, not great, but now probably need to adjust the carb to this motor. At least now I can focus on one thing.
The question is WHERE did this debris come from, (it had to have come in through the throat) and how long had it been there??? Wait a minute. Was this Warbo carb the issue??? OOPS, getting ahead of myself here. Maybe that Heli-Coil in the main jet body was not factory. And the wanabe mechanic tried to fix a screwed up project then tried to renew stripped threads, but got it too deep or too short of a insert?
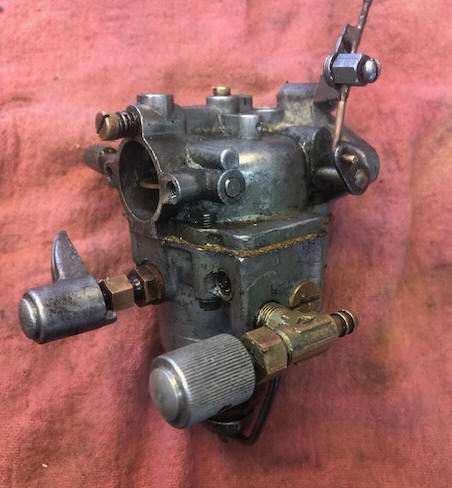
Carburetor : The carburetor on this 1952 was a Tilltison MD 2A.
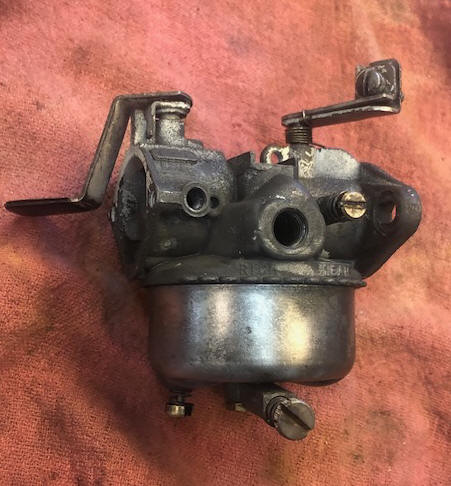
The carburetor on this 1959 was originally a Walbro model LMG 175 A. It appears that these motors were fitted with the Walbro carbs for only a year, the last year of production for Sears. Walbro carbs were used on many push lawn mowers in those days.
| Here you see the Walbro | Here you see the Tillotson |
 |
 |
However after getting into it, (the Walbro) it appears for the high speed
main jet, the threaded body's threads were drilled/tapped oversize to
accommodate a Heli-Coil thread insert (possibly to ensure the brass jet did not
get cross threaded in the pot metal body. However on this one the
Heil-Coil was threaded in so deep that the jet threads only had about 1/2 a thread
engagement.
My alternative was to make a new longer brass jet, or find a different carburetor.
Well I just happened to have a complete (but crudded up) 1952 2 hp seized junker Elgin motor which still had the original Tilltoson carburetor, that just happens to be the same as the ones that the 1958 motor came out with. These Tillotson carbs have a glass settling bowl on the bottom of the float bowl. DO NOT break that glass bowl, and trying to find a replacement gasket might be a trying experience. Even making a new one of cork gasket material proved not that effective. However I found a Neoprene O-Ring 1/8" thick by 1 5/16" OD works quite well.
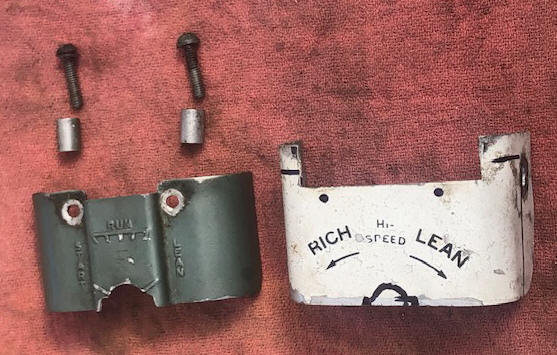
Shown below are the carb front covers off the 1952 on the left, and the different one off the 1959 with Walbro, but with my markings to modify it to fit the Tillotson carb that I replaced the Walbro with.
|
Here you see the carb cover off the 52 on
the left & the one off the 59 on the right, marked to be cut to fit the Tillotson |
 |
Starter :
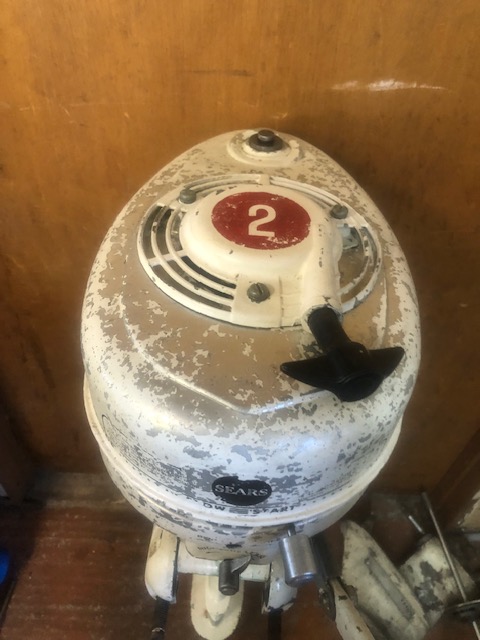
The early version (1952) used a separate wrap around rope which is hand
wound onto the spool
attached to the top of the flywheel. Later about 1954, was
incorporated a recoil type starter unit.
|
Here you see the wrap around rope starter
on the 1952 |
Here you see recoil starter on the 1959 |
 |
 |
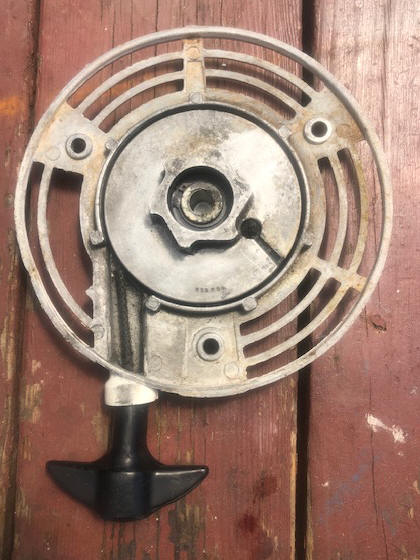
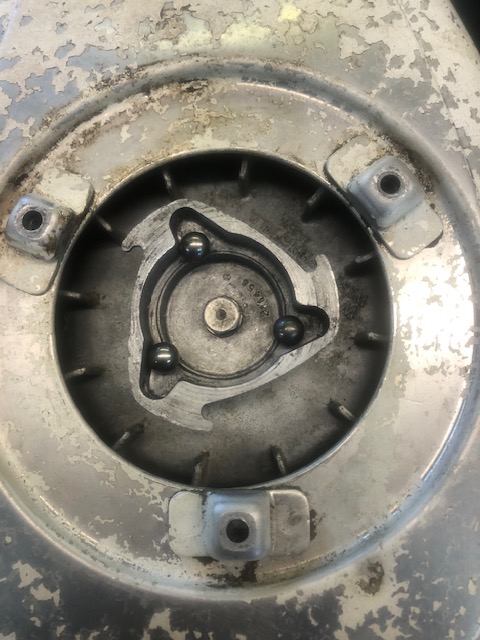
The recoil starter motors use a different pawl engagement than most. Here mounted on top of the flywheel is a "cup" that has three cavities around the inner periphery that hold three 3/8" steel ball bearings. These bearings engage any of the six protrusions on the removable recoil starter unit. Centrifugal force disengages them when the motor starts.
| Here top half of this 1959 starter system | Here you see recoil starter's moving parts (the steel balls) on the 1959 |
 |
 |
Cooling : These motors are forced Air Cooled, meaning the flywheel has fins on it to force air over the cylinder's fins. There is a thick cork gasket between the fuel tank and top of the engine to ensure that all the air flow is forced over the cooling fins of the cylinder. However, it does have a water cooled midsection/lower crankshaft seal in that a small water pickup tube is positioned in the lower rear exhaust behind the prop. The prop thrust pushes water up inside the midsection and sprays it out right under the power head, cooling the bearing seal AND protects the midsection paint job from too hot of an exhaust.
Gearbox : These motors have no shift or neutral provisions, therefore they are in gear at all times when the motor is running. Gears here are 14 teeth on the drive shaft gear with 21 teeth on the prop shaft gear. There is no grease fill or drain plugs, just pack the cavities with waterproof grease.
Propeller : These motors since they have no transmission, and being direct drive use a LH propeller. I have seen two aluminum props, one a 6 1/2" X 4", the other a 7" X 4" and a plastic 6 1/2" X 4" on the 1959.
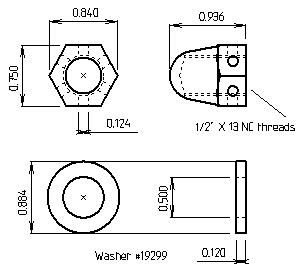
Most of these old motors you will encounter will have the propeller nut washer missing. The original washer was probably steel. This may not be that important, but a replacement Nylon flat washer with a 1/2" hole X 1" OD can be found at many well stocked hardware stores that carry a bolt and nut selection. The best OD that fits, but does not restrict flow and blends with the rear of the propeller and under the nut appears to be 7/8", which can be cut down to from the 1" size.
Propeller nut cotter pin would be a 3/32" dia. by 1" long, and stainless steel would be preferable.
| Aluminum propeller #18265 | Prop nut #19094 & washer #19299 |
|
|
 |
Observations : The 1959 appears to be the last of that air cooled type made by West Bend and sold by Sears. However this was not the end of West Bend, as they continued to produce motors for a number of years. One thing they did for their own after the contract ended, was (to open up) the bore to 2 1/16" of this motor upping it from 2 to 3.5hp, which then put it into competition in the 3.6hp category of the Scott's water cooled, and at a cheaper price.
In my opinion from observation and research, it appears that this 1959 2 hp was possibly assembled from remaining parts, or non-standard and/or cheaper parts, kind of as a clean-up, (like the carburetor) and other nondescript parts, along with minimal paint preparation.
These motors are an easy starter, (if the carb is adjusted right). By this, I mean the carb mainjet knob, needs to be rotated the the left (richer) to start, then it can be moved back to the sweet high speed spot which I set the knob pointer to straight up. This high speed adjustment is pretty darned sensitive, so you want to go back to your sweet spot for any running, even for trolling, where here the carb's upper idle knob takes over.
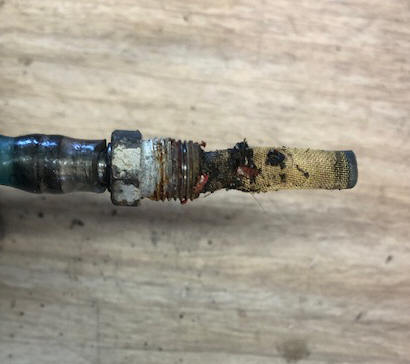
OH yes, when I got it running, it would run of only a few minutes and then die, WHY? It seemed to be starving for fuel. Well, the one thing that I did not check was the fuel outlet/strainer in the tank. When I pulled it out, I found the fine screen inside the tank had a lot of debris on it, which was blocking about 90% flow. I washed it off in gasoline and used compressed air to get the debris off it. This solved that problem.
| Here you see the in-the-tank strainer |
 |
This motor is my backup motor when using my 14' aluminum boat which is outfitted with a 1990 15hp Johnson that I have not ran enough to be comfortable without a backup. This 2hp is small enough that it does not hinder space even in this small boat. It is not pretty, but functionable.
Back to the Main Ramblings Page
Copyright © 2023 LeeRoy Wisner All Rights Reserved
Originated 05-19-2023, Last updated
11-06-2024
Contact the author
Elgin Tillotson carb adjustments
When you are ready to run the motor, both needles should be preset to 1/2
turn, then adjusted as necessary for smooth running. The high speed needle
should be opened an additional 1/4 turn when starting cold. After the
motor has warmed up, the high speed needle should be adjusted to its final
position. When the motor is running well at high speeds, the low speed can
be adjusted. The low speed adjustment is very sensitive and when it is
readjusted the motor should be given 5 seconds or more to fully respond to
the new setting.
This is a Tillotson model MD 59A, (identical the the MD 2B) but has a glass strainer/settling bowl on the bottom. These carburetors very seldom need new parts other than gaskets which can be made from gasket material. The entire carburetor usually only requires a complete cleaning as did this one. These carburetors use a 2 part brass float that is soft soldered together. They have adjustable high and low speed needles. This model also has a fuel shut off valve at the Ell that goes directly into the carb.