 |
Sears GameFisher 3 hp Outboard Repair |
One thing that I want to convey here is that I write only on motors that I have actually worked on, and over a period of MANY years, consisting of many THOUSANDS of hours, and then more in maintaining/updating these pages. These articles are usually motor specific, HOWEVER if you are having a diagnosis issue, my Trouble Shooting article covers MANY more aspects that may help you diagnose your issue. CLICK HERE for access to that article.
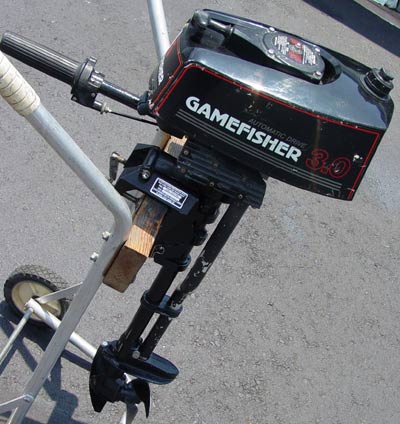
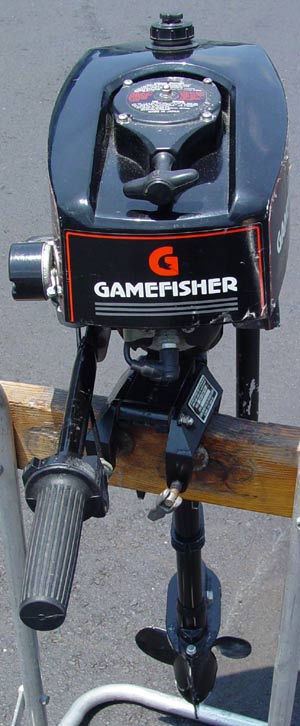
The motor we will be dealing with here is a Gamefisher 3hp outboard sold by Sears Roebuck & Co. Model 298.586193, s/n 298801X made in1987 by Tanaka Power Equipment of Japan from 1985 to 1995.
This motor is an air cooled 2 cycle, and completely different design than what we normally see in the small US made motors. It uses a motorcycle type carburetor and throttle cable twist grip adjustment. It also has a internal low speed clutch. The fuel tank is a plastic/Nylon held in place by rubber straps. The spark plug is on the front of the motor. The motor cowling again is plastic/Nylon and held in place by the recoil starter mounted on top. The choke is simply a pivoting paddle covering the carb intake.
I did find a pdf owners/parts list shown HERE. This motor has the specifications listed below, (NOTE the high speed RPM which is considerably higher than any comparable US motor). On the initial running (not in a tank), I found it to not run well at a slow speed, but that was where it appeared the clutch started to engage and running it without being in water, I was only going on the noise it made. My first thought was maybe it was not designed as a slow speed trolling motor, BUT then with this small 50cc powerhead, the low RPM would equate to maybe 1/2 the normal US hp. Therefore maybe at a slightly higher lower RPM, it might work OK for trolling on a boat.
I acquired this motor along with another small non runner 1978 4hp Chrysler for hauling them off.
This one took a bit of cleaning the carburetor and replacing the fuel line, then getting the carb's throttle cable adjusted right. Believe it or not, the compression was 142# and it usually starts on the first or second pull when choked. It has a push kill button to ground out the ignition, mounted on the front LH side of the cowling. The fuel sediment bowl is removable and has a built in ON/OFF valve. There is no water pump.
The only issue is cosmetic, being a small piece is broken/missing off the rear of the cowling, along with part of the bottom plastic choke cover is broken off, which originally held a rubber elbow type breather tube pointing rearward and up.
The manual pull starter unit is a dual pawl system held in place by 4 bolts from the exterior top of the cowling in front of the fuel tank. The one thing that I found here was that if you wanted to start/run the motor with the cowling off, you have to place (3) 1/4" flat washers under the starter mounting screws (to compensate for the thickness of the cowling) otherwise the starter unit sets too low, dragging on the pawls. When reinstalling the starter unit, you have to synchronize the starter unit to the two pawls in the housing on the top of the flywheel. In the photo below, you see (on the left) the removable starter housing unit. On the right is the engagement pawls mounted on the flywheel extension.
| Here you see the starter system, with the removable part on the left |
|
|
The propeller is a RH
rotation, the shaft is 12mm or about .471" so if you break a prop, possibly
one off a Johnson/Evinrude in the small hp size. This prop is driven by
a shear pin, (.184" Dia. X .950" OAL) with spares and spare prop cotter
pins, located in a rubber holder under the gas tank. The cotter
pins are .084" dia. X 2.250 OAL.
| Here you see the spare shear pins and prop cotter pins |
|
|
The carburetor is a simple motorcycle type, (meaning the throttle slide moves vertically in the upper body), activated by a sheathed cable from the top, to the twist grip motorcycle throttle. In replacing it in the housing, it has to be aligned with a small internal alignment pin low in the hole). It's adjustment is accomplished on the twist grip end of the cable by a threaded hollow shaft that is locked in place by a threaded knurled nut at the base/twist grip unit. The carb is held in place to the manifold, (not by bolts) but by a heavy duty hose type clamp. The main-jet is easily removed for cleaning, and is a #74 drill size (about .017" dia.). The float is not the normal hinged type, but still uses a needle shut off valve, driven by brass arms which rest on the independent float captivated inside the float bowl body.
The electronics system is a transistorized unit operated in conjunction with the magnets in the flywheel.
The tiller handle does not fold up, but down, which then can be used as a carrying handle if the motor is tipped onto it's RH side.
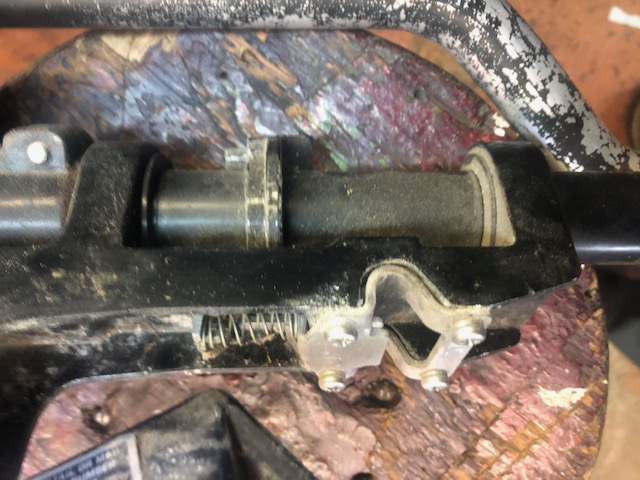
The tilt lock (hitch pin on their parts list) is a 6mm pin with a small spring loaded detent ball, with an overall length of about 3". If it is missing, it may be easier to simply drill the holes out oversize to 1/4" and replace it with a standard bolt an nut. This pin also functions as part of the anti-kickup when the motor is rotated into reverse as seen in the photo below. In forward, it rests in the metal recess (white metal), and there is a cam on the driveshaft housing that activates the visible spring, which locks the motor when rotated to the side for a partial reverse .
| Here you see the anti kickup reverse lock system |
 |
Copyright © 2023 LeeRoy Wisner All Rights Reserved
Back to the Main Ramblings
Page
Originated 02-07-2023, Last updated
07-04-2023
Contact the author

