 |
Improving Import Band-Saw On/Off Switch Location / Light |
`
 |
Improving Import Band-Saw On/Off Switch Location / Light |
We home shop wood and metal work
enthusiasts are now pretty much confined to purchasing machinery made in either
Taiwan or China. And you are pretty well limited to their modern manufacturing
shortcuts. Here, I see the desire to make parts that can be somewhat
universal, creating families of machine tools, to save money from not having to
make somewhat duplicate parts (and in this case the bases where the on-off
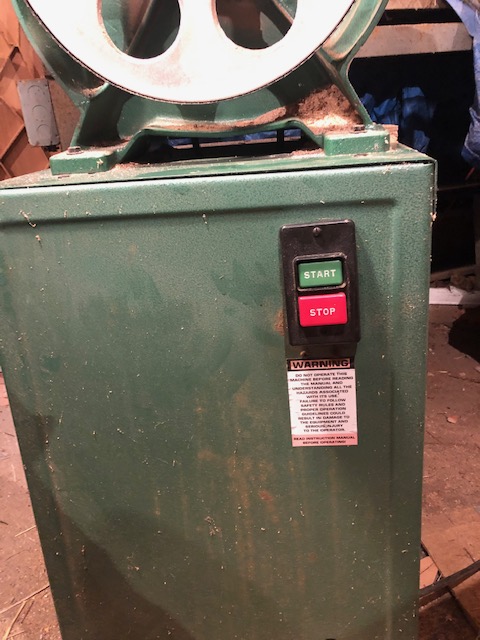
switch is located). BUT for me, with the on/off switch on the base, where you
have to lean over to turn it ON or OFF is a safety issue. I want the switch up
near arm level where it is easy to operate without hesitation.
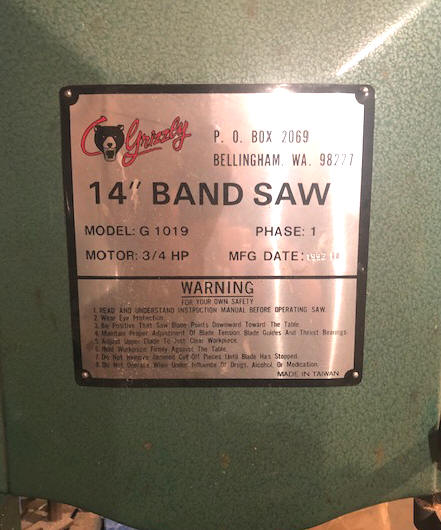
The saw I am working on here is a 3/4 HP 14" Grizzly #
G 1019. I recently traded my larger old Walker Turner to my son, who
purchased this one new in 1996.
| Here is the bandsaw I am working on. |
 |
I had an experience with the same switch location on a import tool and cutter grinder a number of years ago. On this new machine, on my first power up, I had to lean over (with my head down in line with the grinder stone), and when I hit the "ON" button, before I could raise my head, the motor started AND upon acceleration, the grinding stone disintrigated, with major parts of it hitting me in the head above my only eye, breaking my safety glasses. That happened with me at the age of about 45 and caused major floaters that the optometrist explained was because at that age at that time, (and that hard a hit) that it broke loose some material inside my eye. LESSON LEARNED.
| Here we see the old switch location on the base of this bandsaw. |
 |
Reposition the Switch :
My plan was to move this
existing switch up and onto the LH side of the overarm
bracket at a height more convenient to operating it.
But the existing switch box was made of plastic mounted
behind the front panel and not usable as a front mount in
the location I wanted it to be. The plan was to
use a new conduit outlet box to be used to mount the switch
into.
Basically,
what was involved was to
disconnect the power cord, pull the existing push button
switch out, code the wires and add a new wiring from the
inlet terminal block, and run these wires from the base up
to the new outlet box. The new outlet box was to be a duplex
conduit box. However on my initial measurements, the US
cover hole spacing of the box was narrower that the Taiwan
switch by about one hole, so I welded the old holes in the
"new" outlet box, and drilled/tapped to match the
Taiwan spacing.
After I got the switch off, I then discovered this new US made conduit box was considerably narrower and shallower than the original Taiwan plastic box that was mounted behind the base material. This proved to be just too small, so I had to fabricate a new metal box about 2 5/8" wide by 4 3/8" long and 2 1/2" deep. This depth gave me enough room for the wiring to not be cramped. I then welded internal lips on each outer end which were drilled and tap #8-32 holes to the spacing matching of the old Taiwan cover plate holes. A 7/8" hole was drilled in the bottom of the box for installation of a 1/2" Romex wire clamp for the wiring to be pulled through.
On
this switch, the cover contained the actual push buttons
separate but directly
in front of the actual switch buttons.
To mount this new outlet box, I
used one existing threaded hole in the overarm casting where
one of the two screws went to attach a plastic blade cover,
then a second 10-24 screw and nut behind (to keep it from
rotating) in the rear of this new box. Then drill a
5/8" hole just below the metal box on the plastic cover for the
new wiring to go out and up into
the box.
To run the wiring
from the base up to the new switch location, there also had to
be a 5/8" hole drilled in the top of the sheet metal base,
another in the outside of the casting, and a notch ground in
the cast iron above to allow wiring to be run up behind the
plastic cover and up, then out into the
new switch box.
| Here we see the newly located power switch illuminated by the light. |
 |
Then a plain
sheet aluminum new cover plate was added to cover the now
existing old low switch location hole.
Add a Table Light at the Same
Time:
While
doing the above and changing the wiring, why no add a light
over this saw?
Here I had a unused old swing arm light that was collecting
dust, so I cut part of the arm off, welding it to a steel
plate and mounted it behind, but near the new switch.
This weld was so that the arm is now ridgid, but placed where the
light hood could be twisted to illuminate the saw blade
better.
For the mounting
this duplex outlet receptacle, I used the center knock out plug
in the rear of a this box and drilled a 13/16" hole in the cast iron
overarm, fastening this box and light bracket using a 1/2"
close pipe coupler and two 1/2 conduit nuts. This
provides a sturdy mount along with a conduit for the wires
to the switch duplex box. This light already had it's
own twist knob switch, so I just used a duplex outlet and
plugged the shortened cord plug into it.
For
power to this outlet, just trace down the incoming power
cord connections and run wires up to this outlet box.
Originated 11-22-2020 Last Updated 03-12-2021
Contact the Author