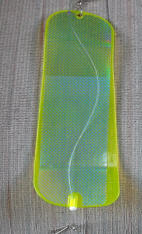
 |
|
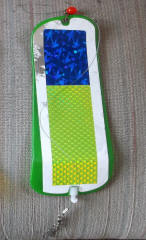 |
Flashers / Dodgers ;
Flashers and Dodgers have been around for years as an attractor
for salmon fishing. Typically using a limited explanation, a flasher
rotates, while a dodger sways from side to side. Years ago, the main attractors were Abe & Al metal
flashers or Les Davis dodgers. There were a few copies of the Abe & Al, of
which two were B&B and Martin Tackle. The metal Abe & Al
and
it's running mate the Kelp Kutter along with the copies have
disappeared but have been replaced by plastic Hot Spots and Pro Trolls.
The Les Davis dodgers
have survived, and have even been downsized to small units many of which are
used for attractors for trolling for Sockeye salmon, trout or Kokanee in lakes.
|
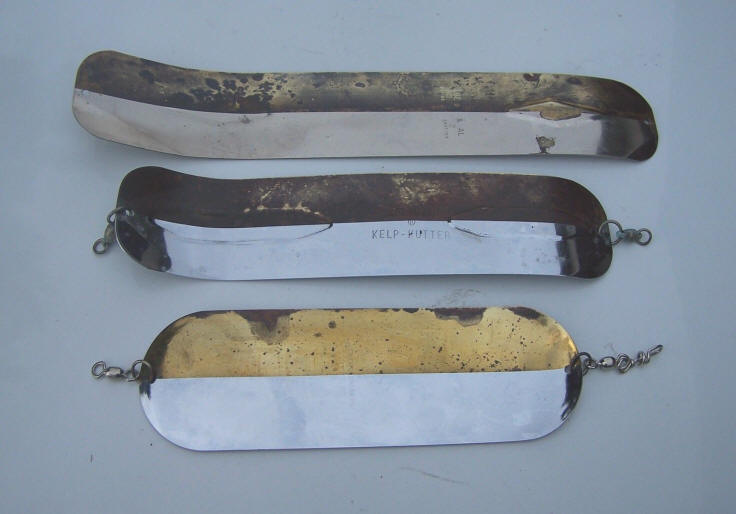
Shown here are well used Abe & Al, Kelp Kutter & a
Les Davis herring dodger, all in 1/2 & 1/2 (tarnished) brass & nickel |
 |
The drawback for the flashers in those days was getting the gear down into the strike/fish zone. That was usually accomplished by using a heavy weight on the line. These weights were rigged with a wire loop and split ring combo running from front to rear. The mainline could be inserted into the loops then slid partly into the split ring which held the weight in that location ahead of the flasher. When a fish hit, the mainline pulled out of the split ring's grip, yet was retained by the loops, where the weight then slid on the mainline so that it was not near the flasher creating a chance for the fish to throw the hooks.
Then along came divers and downriggers which totally changed the game in getting the gear down. Flashers then flourished, being made of plastic and when being used on a downrigger, the weight problem no longer existed. However there was still a drag between the fish and the fisherperson once the fish was hooked.
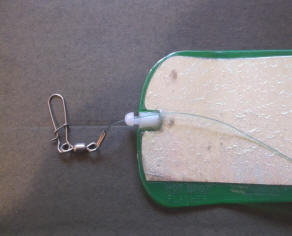
Break-Away Flasher ; Some fisherpersons accepted that this was the way it was, while another concept of having the rear of the flasher become disconnected when the fish hit the lure, which will allow the flasher to slide up the mainline (within it's constraints), more or less fluttering but still captivated on the mainline. This is known as the "breakaway flasher", in that when the fish hits, the flasher's rear retaining pin pulls out, disconnecting the flasher's rear section from being inline, and removing some of the inline resistance directly to the fish. This flasher is made by NW Cove and comes with it's own short section of mono which has a large bead sliding on the front section of mono and to position the flasher when in operation, a metal crimp about midsection on the mono to trip the plug. It uses a tapered plastic plug on the rear that the line goes through. When a fish hits, the crimp slides rearward, pulling the plastic plug out of the flasher body. The large bead also stops the flasher from sliding far up the line when the fish is on the hook.
If you are like me, having numerous standard flashers and the availability of now being able to obtain reflective UV tape, gives you the opportunity to salvage some older experienced functional flashers. In making this break-away modification, you need to acquire a nylon bushing at your local hardware store for under 25 cents. These bushings need to be 3/8" OD x 1/2" OAL x .171 ID. You then need to saw the rear metal ring out of the standard flasher's plastic so you can have a press fit of the bushing in this slot and then epoxy the bushing into the flasher.
You will note in the diagram below that the placement of the crimped on metal sleeves is critical in the operation of this unit. Shown here, the mainline is attached to the swivel eye on the right side of the illustration. The main pulling point of the flasher is on the large plastic bead held in place by the crimp and then against the large (but slightly smaller) front swivel ring. When the fish hits, this 60# mono is pulled to the rear and the center sleeve comes against the plug, pulling it out of the rear of the flasher, allowing the flasher to then only be attached at the front and with less resistance on the line.
| Illustrational diagram of the Q Cove break-away flasher |
 |
NW Cove sells replacement plugs for their Q Cove flasher for about $3 a pack, and you can make up the rest for your own unit using a short section of 60# mono, a large plastic bead, crimp and swivel/snaps. It may be best to probably purchase the newer style factory unit and copy the mono length and spacing of the crimp/bead and swivel. This unit adds about a foot more between the mainline terminal swivel/snap and to where the leader is attached to the flasher, so you may want to look at your leader lengths and adjust if needed on some lures so you do not have an excessively long line from the mainline swivel at the rod tip to the hooks, which can be a handicap at netting time.
One fisherman who uses these, suggests you smear a bit of Smelly Jelly on the tapered plug to be sure it releases when a smaller fish hits.
| The Q Cove flasher | Original Hot Spot flasher | Modified Hot Spot Flasher |
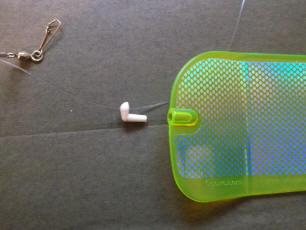 |
 |
 |
In the photo below, you can see the Q Cove flasher on the top and a Hot Spot
on the bottom that has been modified to accept the Q Cove style plug.
|
Here is a factory break-away flasher on the top & a modified
Hot Spot on the bottom, note the large red bead on the modified one while the upper factory uses a clear bead |
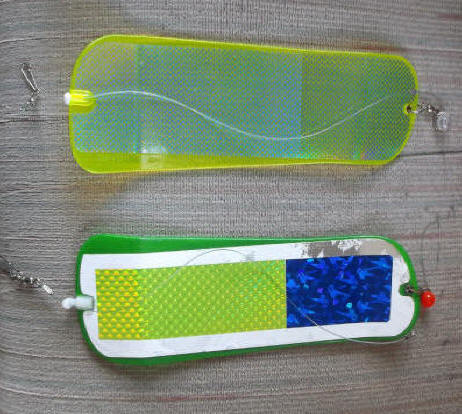 |
On the modified flasher, you will notice newer tape overlaid on the deteriorated original tape.
Other Break-Away Flasher Conversions; So now, a couple of other companies have specialized in building the break away conversions. One is Good Day Fishing and the other is Simon, and later the Coldwater Strong. All of these are a lot simpler than the one described above. And of these companies also build other fishing equipment, like spinners, or wobblers, so they are very in tune to how to make their product work. Both have been designed to operate on about all of the 11" flashers being made.
The Good Day unit sells for about $14 and uses a special made white Nylon ball and a black socket which can be adjusted for tension by a simple screw. www.gooddayfishing.com . The Simon sells for about $12 and uses two small opposing magnets as the connection, enclosed in stainless steel couplers, which to the untrained eye, may resemble a swivel. www.simonwobblers.com. The other newcomer uses a hairpin style non adjustable snap over a bulb (advertised at 70#). It sells for about the same as the others www.coldwaterstrong.com .
| Here is the Good Day break-away flasher conversion to a Pro Troll flasher |
|
|
On the Simon, for the Pro Troll flashers they recommend to cut off the swivel and attach the supplied snap on the flasher's rear ring. Well this swivel was a ball bearing one, and my experience is to use as many of these as possible, so instead of cutting off the swivel, I just added a large split ring instead between the existing flasher's ball bearing swivel and the breakaway magnet. This method amounted to about the same distance, so no dysfunction in the operation of the magnets should be occurring, as after the magnets disengage the cable only moves 1/2".
The only drawback on using these, is that you need to be sure that the wire goes on the proper side of the flasher when you put it in the water, otherwise it may not rotate as desired, OR disengage properly.
| Here is the Simon break-away flasher conversion to a Pro Troll. The magnets are the center unit that the wire is attached to between the be ball bearing swivels |
|
|
Now, here is another modification you can do to these type of flashers. They were designed to rotate in a large rolling motion, which required for you to maintain a speed of approximately 3 miles per hour. What if your needs required a lesser speed? Pro Troll then added a small wing on the rear section, which they call an "Agitator Fin", which gives the flasher more KICK allowing the slower speed, even 1 MPH, yet still achieve the full rotation. They still make the non-fin model also, so if you are looking for a finned model, check the inventory before you pull out your wallet.
But what if you have a lot of the older flashers, even different brands that do not have this fin? In the LH photo below you will see the late factory flasher with the fin on the left. In the middle is one I have added a fin, and on the right is a unaltered flasher. The far right photo is a angled side view of this fin, showing more clarity of what it consists of. This new added aftermarket fin was made of a section of a faded out electric fence warning sign. The size is 9/16" X 2" and simply JB welded onto the flasher using the same angle as the new fins. You will need to cut and peel back the tape, then remove the adhesive with rubbing alcohol before trying to glue it on. For adding it to the older Pro trolls, there is a mark on these that you can use as reference to glue it over. However I found that the JB Weld did not hold, so clean it up and Super Glue it back in place.
| Here are an example of flashers with the fin on the left, an added on fin and a naked flasher on the right | Here a side view is shown |
|
|
|
One question that pops up frequently is, what size bumper leader (from mainline/sinker to flasher) do I need for a standard 11" kicker fin 360 flashers? Here is a copy from Pro Troll's website. For 11" kicker fin 360 flashers, we recommend using 18", 24" or 30" bumper leaders. You will find the best results using this length to get maximum rotation on all kicker fin 360 flashers.
Here it is important to have the right "Bumper" length to achieve proper rotation, along with the proper leader to lure length to impart action to the lure while not jerking it all over and hard for the fish to get a chance to get ahold of your lure.
| Here is Pro-Troll's illustrated diagram on how to rig theirs |
|
|
Now, I know this is a flasher article, but one more important item that Good Day Fishing makes that enhances these, or any other system WHEN USING BARBLESS HOOKS, is a small bungee shock cord, which they call the Green Weenie. If you add this behind any flasher, or in front of your leader, they are designed to keep just enough tension on the fish so that it has less of a chance to throw the barbless hook. At rest, they are only 4" long, but extend to 8" when at full pull. This distance is governed by a heavy cord INSIDE the green rubber tube.
| Here is shown the Green Weenie from Good Day Fishing |
|
|
Copyright © 2014 / 2023 LeeRoy Wisner All Rights Reserved
Back to the
Ramblings Home Page
Originated 02-14-2014, Last
updated 09-07-2023
Contact the author
