 |
Trials &
Tribulations of Owning / Repairing an Old Riveted Aluminum Sled
|
Aluminum Boats - Good / Bad ;
Condition means everything
in aluminum boats, especially the older rived versions. In the early
years, these aluminum boats were an offshoot of airplane building style, (rived aluminum).
Later welded aluminum has become the norm now.
For the novice it is recommended to stay away from the riveted
models of any make. The reason is, if they are run a lot, taking
of pounding, these rivets begin to work loose, creating leaks. Salt water
(even brackish) can also be more invasive, creating corrosion and/or getting in under those rivets
and worse leaks.
Typically these hulls are made of thinner material so they can bend
and attach it to inner ribs, this thinner material does not lend itself to not being effectively welded if being repaired.
Modern hulls are thicker and made of a harder, more durable
material, and heavy enough to be welded, making for a more durable boat.
And with modern technology, can be CAD drawn and laser cut for precise fit.
They also do not rely on ribs, but are designed for the sides, bottom, keel,
bulkhead, floor supports, chine rails and other parts to be all welded together, making for stronger
construction.
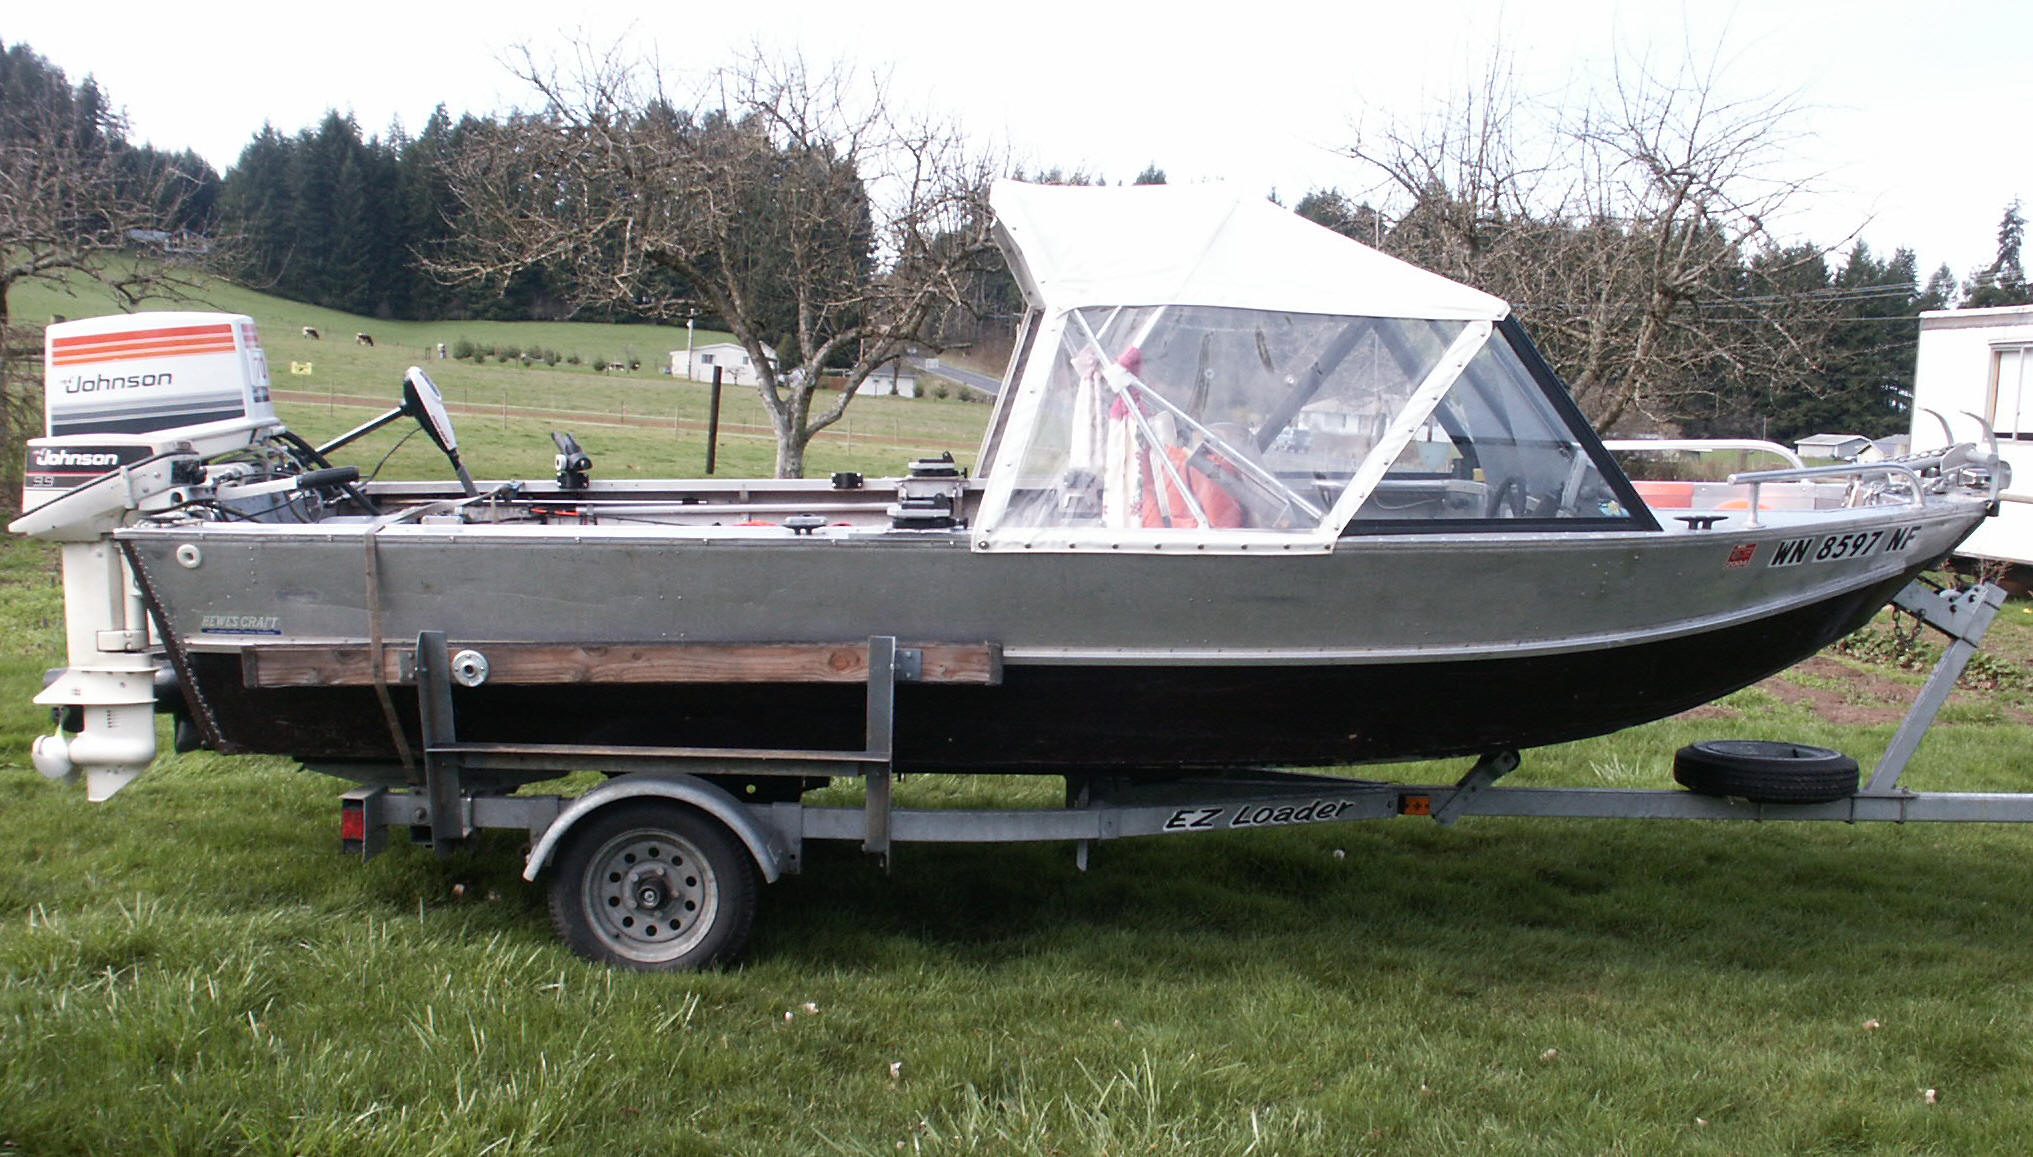
| Here is a boat very much like the one I have modified. |
 |
My First Association With a Riveted Aluminum Boat ; Being DUMB, FAT and HAPPY, I found a used boat like a few of my friends had at that time, so I bought it. It came with a old 40 HP Johnson jet, but that is another story of a misguided me and I soon found a used 1980 70 HP Johnson prop motor and installed that, which proved to be a very reliable motor. This boat apparently had been used in a saltwater bay and was afflicted with numerous hull leaks at the rivets. Of course the owner that I purchased it from professed it to be a non leaker.
At the time I also owned a 20' Fiberglass Tiderunner offshore boat and wanted a smaller one I could run in lakes, rivers or even bays. Even though I had owned a number of boats in the past, never an aluminum one, so I had ZERO association with this type of boats. MY MISTAKE. This new boat to me was a 1979 riveted aluminum 16' Hewes Craft "RiverRunner" open boat.
When I got this gem, the bottom and
sides up to the spray rails was painted a dark purpleish brown color. I later
decided that they had done that to try to seal some of the leaky rivets.
First off, the large amounts of water coming in was not at the rivets, but from
the rotted plywood transom. There had been a sonar transducer
mounted on this transom, but it was removed and the holes plugged from the
outside with Bondo. What I found was this plywood transom was so
rotted and with missing laminates running from the outer edge inward then
through these now hollow wood channels and into the boat from the unpatched
inner holes. Try as I would, I could never get water stopped from
coming in there, (not even considering from around the loose rivets), but this leak was the most important
initially. Therefore a whole new transom was
recreated of double 3/4" plywood, then FITTED and securely screwed and CAULKED into the sides and bottom of this
aluminum hull.
The
bottom leaks proved almost as challenging, but not as labor intensive, requiring filling the boat with a
couple of inches of water, (but being careful to not add enough to overweight
the smaller 12" tires), and then crawling under it, marking all the leaky rivets with
a felt marker. This was not a single exercise, but numerous ones
before I got most all of them either tightened or replaced.
Two methods were used, (1) simply by using a riveting punch and a heavy steel backing
block AND two people, to upset the existing loose rivet enough to tighten it.
(2) if the rivet was too loose, then drill it out and replace it with a next
size larger rivet (tighter in the hole) and again using the same tools, hand rivet it
in place.
Some sources recommending painting the outer surface with pickup bed-liner.
Others suggested to do basically the same on the inside. My concern
was that if either of those did not hold, then I had boxed myself into a corner
with little way out and possibly not solved the situation. This one had already been painted on the bottom and
obviously did not solve the problem.
Modifications to This Boat ; Me, being accustomed to my big boat having the convinces of a convertible top, I soon became interested in putting one on this open boat, but a windshield would also be needed. In doing my looking, (at that time, 2001) I found that Hewes Craft still had some spare parts available, namely windshields. At the time, (these were made, they were all pretty much the same basic design, EXCEPT as the later models came into being, they simply widened the hulls. They did not have any windshields for my older narrow width of hull windows left, but did have for ones a few years later, being about 4" wider. In my careful measurements, I could fudge outward 1" per side and still have room to mount these windows on the gunnel, If I cut down the center fold out window by 2".
| Here is my boat in the somewhat early stages of modification |
 |
Then after being observant and near other sled type boats, an open bow would really be nice. So one winter I set forth in cutting the forward deck all apart. I cut the top out, installed a bulkhead in front of the windows, with two small folding center doors along with fabricated a molding around the inner top edges. A center support was needed under the dash at this now pass-through, and on top the dash for support of the inner edges of the stationary side windows. Then I made a new forward floor out of aluminum diamond plate, which was fitted, attached and caulked at the hull seam line.
For water run off in this now open bow, a hole was precisely cut through the sides of the forward hull, so any accumulated water could run into the square aluminum channel rub/spray rail reinforcement ribs on the outside of the hull.
Then in the now forward deck diamond plate floor, an 8" x 20" hole was cut and the lid hinged to form a shallow storage compartment. This forward floor was then covered with outdoor carpet as a nonslip covering.
Below the center window, are two outward swinging doors. On the bottom of this center window a 4" strip of 3/32" black rubber gasket material, which acts as a water drip shield keeping water from coming into the cabin, as seen in the LH photo below.
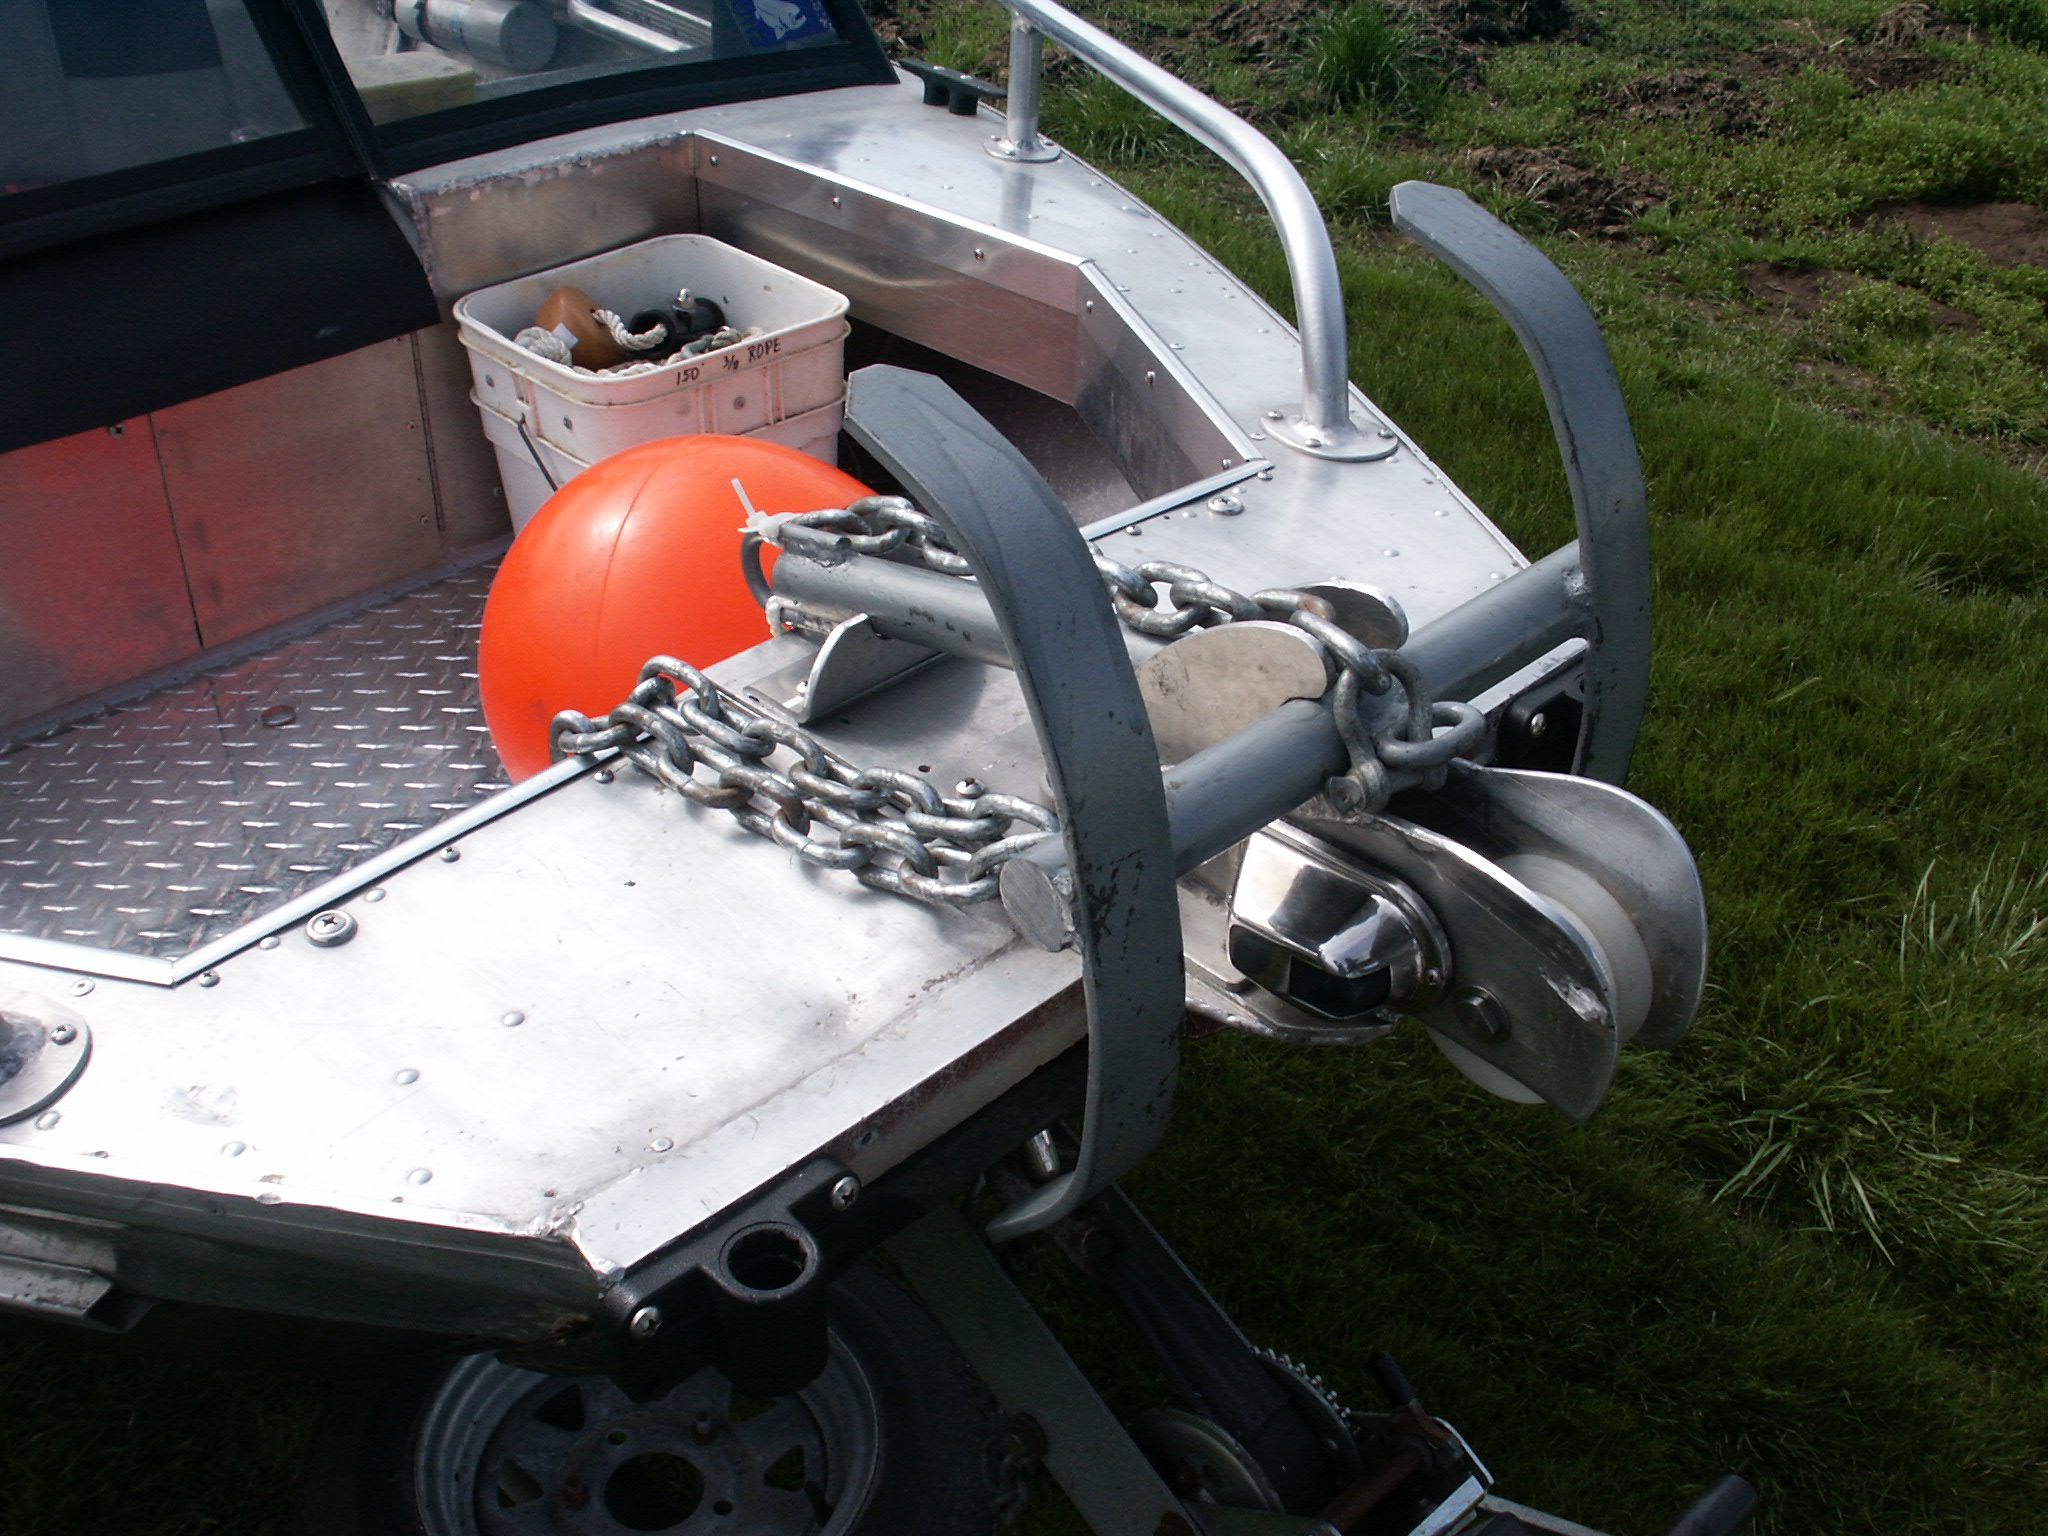
Then a anchor nest/bow light unit was fabricated, and a Columbia River rocker style anchor along with a anchor puller float added. In addition, a 3/4" aluminum pipe bow railing which was added on each side.
You will notice on the photos below, two rod holders on the forward edge of the bow. These are used to mount a set of cheap docking lights into.
| Here you see the now open bow, bow rails & walk thru window | Here, a
clearer view of the anchor nest & bow light |
 |
 |
In the photo LH below, the windshield wiper is hand operated from the inside. And above the center fold out window, the convertible top has a zippered flap opening the same size as the window. Also where the top is snapped to the top of the windows, I installed the snaps closer than conventional. The reason was that I have (when in rough water) seen water come over the bow and UP the windshield with enough force to force COLD water under the top and onto your lap.
Then a canvas bow cover was fabricated, being snapped in place, and supported underneath by a removable 3/8" x 3" oak strip, arced upward and secured at the sides by a machined aluminum pocket.
| Here you see the canvas bow cover in place |
|
|
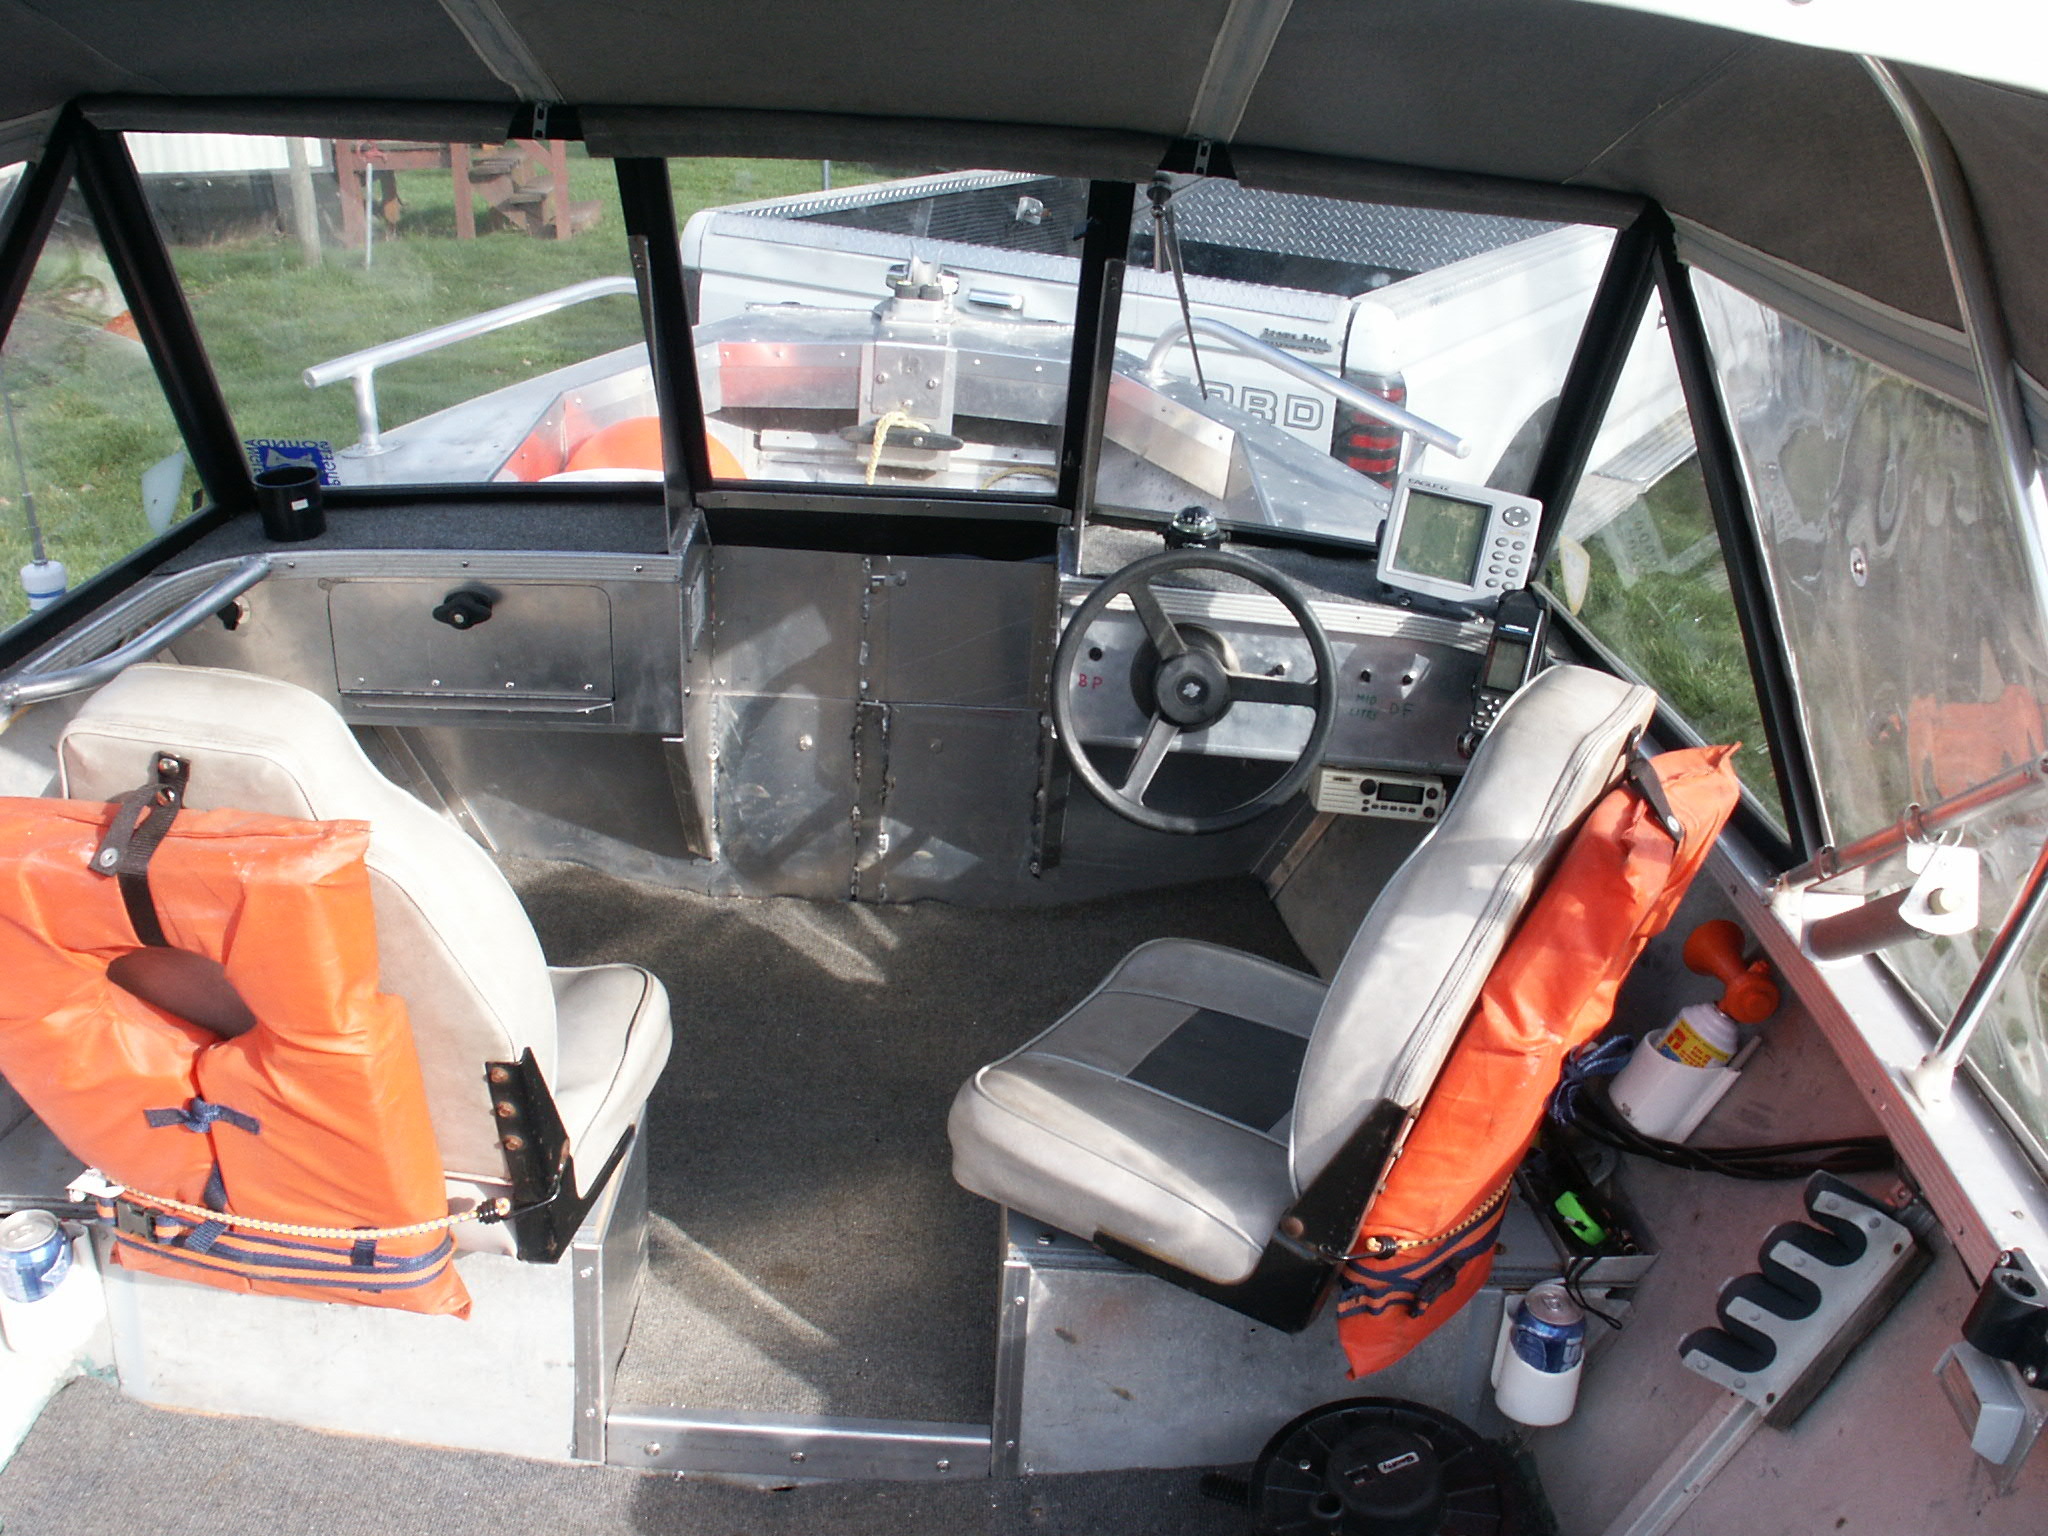
This boat originally had two cross seats (front and rear) with floatation foam underneath. I proceeded cut the front one in two, providing a walk through at the center at the forward seat area.
You will also notice in the photo below a fabricated glove box installed on the left hand dash and a welded 3/4" pipe hand rail for the passenger.
This boat was home to more than one sonar unit during the time I owned it. Also mounted on the dash was a compass and under the dash at the skipper's station, a VHF radio was mounted. The antenna (a folding unit) was mounted on the Port side about a foot behind the front edge of the window. And in the photo below you can see the Freon horn beside the seat.
A fuse panel was mounted up under the RH dash near the steering wheel, which provided power to the lights, VHF radio and sonar unit.
Outdoor grey carpet was the floor covering over 3/8" plywood.
| Here you see the cabin, & seating arrangement |
 |
For the rear cross seat, I took it completely out, but reinforced the existing ribs under the old seat, replacing that seat with two aluminum large side seat boxes attached to the old side ribs. These seats were made with hinged plywood seat lids, incorporating storage and space for two batteries,12 gallon fuel tank on the Port side and a insulated fish box on the Starboard.
| Here you see the Starboard rear seat with a Grand Koolee cheap Styrofoam fishbox | Here, are
two batteries under the LH plywood cover along with a 12 gallon fuel tank. |
|
|
|
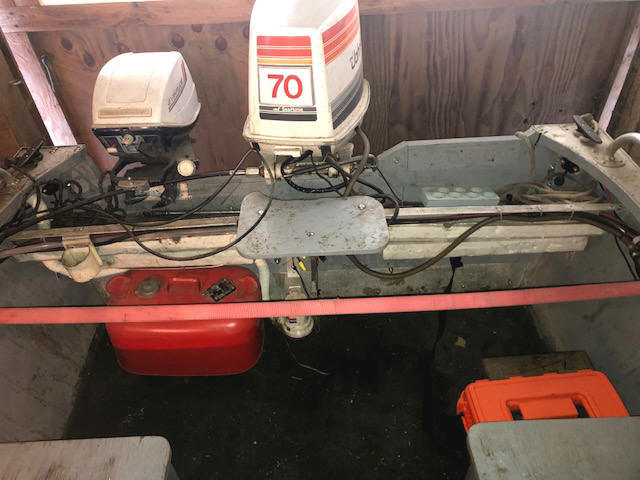
At the rear, other modifications were made, for mounting both the main and trolling motors, and a small plywood seat for sitting when operating the trolling motor.
| Here the rear
view showing splash well shelf, the motors, trolling motor seat & fuel tank, cup holder and bilge pump |
 |
With this boat being smallish and open to where if it was left at a dock or moored, it may be susceptible to theft, or a rundown battery if nothing else, so I installed a separate battery cable shut off, requiring a special key on the rear of the port seat. This battery/fuel tank box lid can also be locked.
| Here you see the the fuel and electric wiring to the motor AND the main electrical shut off switch |
|
|
Since the removal of the forward deck and seats, required the elimination of flotation foam, I tried to replace as much of this foam as possible, in and around the rear seat boxes, and under the transom shelf, and up under the edges of the now open bow.
Then a bilge pump was installed and a small plywood seat installed to the rear splash well to be used when using the trolling motor. This was directly in front of the main motor, which also then provided a backrest if wanted.
More modifications came over time, being rear 3/4" aluminum pipe hand rails along the gunnels which also served as locations to mount fishing rod holders. Then came addition of reinforced downrigger bases to the gunnels for use with manual Scottys. Internal side gunnel lights were also installed.
This boat's transom has been home for numerous propulsion units. Starting with a 1971 40 HP Johnson that I had assumed was the original motor to that boat, but after extended trials and ERRORS that it appeared to merely a old motor put on this sled to just sell it. No matter what I did, I could not get it up on a plane. I then purchased a used 1980 70 HP Johnson motor that proved to be a very good motor. I at one time even converted it to a jet pump, and used it like that for a number of years that way, (but never really needed that shallow drive or liked the consequences involved). So when I gave this boat/motor to a grandson, I converted it back to a prop, as a newbie to boat ownership did not need the inaccessibility to full neutral or questionable reverse when returning to a launch and reloading on the trailer if in a wind or side current.
As for axillary power, trolling motors over the years of ownership ranged from many 9.9 Johnsons (1978,1985, and 1994). Then 6 HP Johnsons (1972 and 1984 being the latest). Even provisions are made for an electric trolling motor are in place.
Also installed was a VHF radio under the dash, using a short foldable antenna on the Port side of the side window. And a Lowrance GPS/depth finder.
The only thing not altered or replaced on this boat was the rack/pinion steering cable and steering wheel.
Trailer Modifications : Early on, I soon learned that the trailer needed some side rails to help loading, especially when using the original 40hp jet. As trying to load this boat on the trailer at a boat ramp with no dock, AND THE WIND blowing, I had the boat crosswise of the trailer more than it being even close to being on. It finally took me getting out, wading (with no boots) and manually pushing the boat against the wind onto the trailer enough to accomplish loading it. You can see these new rails in the full boat photo above.
Also incorporated in the Starboard side rail is a angle iron step to help climbing into the boat without stepping on the fender.
Rescue From Hell : During Lewis County's 2007 flooding. I personally was called upon to rescue a lady and her son who were stranded in her house and the river was still rising. Her house was on slightly higher ground than her long driveway but she waited too long before deciding to evacuate, and then could not get out. She then refused to be airlifted out by a chopper because she was scared to go on it. Mind you this was 8 hours before the river crested there. Her brother, (my neighbor) contacted me to take my jet sled to rescue her and the son. She lived on the other side of a railroad tracks (which is raised and forms a kind of a dike) from me, however the water was high enough and be going over these tracks by about 6".
My boat at this time as the one described here, an old 16' riveted aluminum Hewes Craft jet sled with a 70hp jet pump for main power and a 9.9 HP as a trolling motor.
We launched the boat in the middle of Highway 6 on my side (west) of the tracks. The water was not quite deep enough (about 6") over the railroad tracks for my sled to navigate over at that time. My son went with me to that point and we managed to drag the boat over the tracks, then into the swift water on the other side, but soon I sucked floating grass into the jet impeller making it very inefficient, I shut it off, hoping the grass would fall out of the impeller. It did, but not immediately, so used the the 9.9 HP to get down the highway, then turned into her long lane. I did not want to go across the fields as it was nearing dark and the fence post locations were not readily seen.
I tried the jet again and the grass had fallen out, so we got to her house, we ran aground in her gravel driveway as we approached her house. Visibility in the water very muddy and was ZERO, and it was starting to get dark. She and son waded out, got in, we were ready to go back. However in the coming down her driveway, I had managed to pick up a floating neighbors garden hose with my motor's jet foot (suction intake). This apparently had gotten wrapped around something underwater in her gravel driveway which had us anchored. Her brother finally got out of the boat and got us free, (breaking off my depth-finder transducer in the process). Now we were loaded down with 4 people, in shallow fast water and the jet was throwing water but would not move us. The brother then drug the boat to deeper water enough to float us. Started the jet again, but only to have it die, the impeller had apparent became plugged with gravel from her driveway.
Back to the 9.9 HP for power, we were then bucking a VERY STRONG cross current and the trolling motor was not powerful enough get me in the middle of her driveway with the now doubled load. The only way I made it out of there, was to scrape the side of the boat along 600' of her fence that was showing above water as the current was pushing me against it. Finally we got to the highway as it was getting dark when I turned west (in the middle of the highway 6), to get back to the railroad tracks where other rescuers were with headlights showing me where to go, I hit something in the middle of the highway with the motor's prop.
Later when the water went down a couple of days later, I found out it was the top of a British Land Rover that was submerged. Later when tearing the jet's foot off to inspect why it appeared to be plugged, I found that her driveway had to have been crushed rock, the impeller and liner were chewed up considerably.
This lady apparently does not understand many things about living in a rural area. #1 you need to be pretty well self sufficient. #2 if you make a misjudgment and DO ask for help, do not be picky in the manner that it arrives.
If I had known before the trip that she had rejected the chopper flight and that her son was not a youngster, (he was actually probably nearer 25), my decision to help may have been different. She did send me a thank you note later.
However the next spring when I got ready to start the boat up, apparently when the had motor died during the rescue, the key was still on and in all the confusion, I did not even consider checking it, which run the battery down during the winter to the point it would not recharge and I had to buy another. That is when I found that the motor was seized. Actually what I found out later after numerous tries to identify the cause by pulling off the jet unit and the motor would turn over, was a small triangular shaped rock had wedged between the driveshaft and the impeller cage, stopping the motor so fast that driveshaft got bent ($168 for a new one).
I then tried to remove the creases in the one side of this aluminum boat, (almost the full side) but that proved fruitless. It took 2 quarts of Bondo to fill the creases caused by the wire fence and numerous days sanding things down. And 2 quarts of $40 a quart paint to get the boat back into operation and looking decent. All things totaled to about $500. So now I have a two tone blue and white boat.
This boat / motor combo, over the years that I have owned it, has entailed many hundreds of hours thinking (designing) and executing thoughts needed to provide a fishing machine to match my needs from what I started with. I got rid of it as at that time I was told by the wife to get rid of at least one of the 3 that I had. Then years later, and a few other small boat restorations projects in between, I got it back, kind of like welcoming a old friend. I did not realize just how much I had done to modify it almost 20 years before. And many memories have now resurfaced.
| Here you see a couple of happy fishers, (my cousins). The one on the left had caught so many fish in his life that the wanted the other to look good & convinced him to hold both their 19# Chinook for this photo 8-30-2006 |
|
|
|
A 14# Chinook
hen taken 9-16-2006 by my little brother (RIP) |
|
|
Copyright © 2020 - 2023 LeeRoy Wisner All Rights Reserved
Back to the Main Ramblings Page
Originated 12-01-2020, Last updated
03-12-2023
contact the author